Hey there, folks! As a supplier of LED Driver Power Boards, I've seen a lot of questions about upgrading existing LED driver power boards. So, I thought I'd share some tips and tricks on how to do it right.
First off, let's talk about why you might want to upgrade your LED driver power board. Maybe you're looking to improve the performance of your LED lighting system, increase its efficiency, or add new features. Whatever the reason, upgrading your power board can be a great way to get the most out of your LEDs.
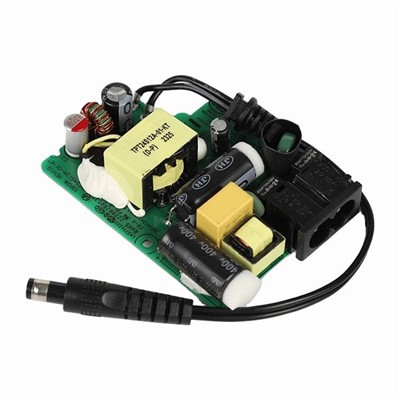
Before you start the upgrade process, it's important to do your research. Make sure you understand the specifications of your existing power board and the requirements of your LED lighting system. This will help you choose the right replacement power board and ensure that it's compatible with your LEDs.
One of the first things you'll need to consider is the power output of your new power board. You'll want to make sure it can provide enough power to meet the needs of your LEDs. If you're not sure what power output you need, you can consult the manufacturer's specifications for your LEDs or use a power calculator to determine the appropriate wattage.
Another important factor to consider is the input voltage of your new power board. Most LED driver power boards are designed to work with a specific input voltage range, so you'll need to make sure the replacement board is compatible with your existing power source. If you're using an AC power source, you'll also need to consider the frequency and phase of the input voltage.
Once you've chosen the right replacement power board, it's time to start the upgrade process. The first step is to turn off the power to your LED lighting system and disconnect the existing power board. Be sure to follow all safety precautions and use the appropriate tools when working with electrical components.


Next, you'll need to remove the existing power board from your LED lighting system. This may involve removing screws, connectors, or other fasteners. Be careful not to damage any of the components or wiring as you remove the power board.
After you've removed the existing power board, you can install the new one. Make sure you follow the manufacturer's instructions carefully and connect all the wires and connectors correctly. Double-check your work to ensure that everything is properly connected and there are no loose wires or connections.
Once you've installed the new power board, you can turn on the power to your LED lighting system and test it to make sure it's working properly. If you encounter any problems or issues, you may need to consult the manufacturer's troubleshooting guide or contact a professional electrician for assistance.
In addition to upgrading your LED driver power board, you may also want to consider upgrading other components of your LED lighting system. For example, you could upgrade your LEDs to more efficient or higher-quality models, or you could add a dimmer switch or other control device to your system.
Upgrading your LED lighting system can be a great way to improve its performance, efficiency, and functionality. By following these tips and tricks, you can upgrade your existing LED driver power board with confidence and get the most out of your LEDs.
If you're interested in purchasing a new LED Driver Power Board or other components for your LED lighting system, be sure to check out our website at LED Driver Power Board. We offer a wide range of high-quality LED driver power boards, AC-DC Switching Power Supply, and Medical Open-Frame Power Supply to meet your needs.
If you have any questions or need help choosing the right components for your LED lighting system, please don't hesitate to contact us. We're here to help you get the most out of your LEDs and ensure that your lighting system is working properly.
Thanks for reading, and happy upgrading!
References:
- Manufacturer's specifications for LED driver power boards and LEDs
- Electrical safety guidelines and best practices
- Troubleshooting guides for LED lighting systems